

Gravity can feel like a bully as we get older, making it seem like the Earth is working harder to keep us down. If “get down on the floor” sounds more like a challenge than an invitation, you’re in the right place. We’ll talk about sitting exercises for seniors because staying fit doesn’t have to mean struggling with a yoga mat or risking a sore back just to stand up again. You can build real strength, improve your balance, and feel more flexible—all from your favorite chair.
Moving regularly is key to staying independent and feeling like yourself. Maybe you’ve noticed your body makes more sounds when you stand up, and that’s perfectly normal. The goal isn’t to turn you into a marathon runner overnight. Instead, we want to help you reach for a coffee mug, play with your grandkids, or walk to the mailbox with more ease and comfort.
The great thing about these exercises is that they fit easily into your daily routine. You don’t need special equipment or to look a certain way. All you need is a sturdy chair and a willingness to move a little today. We’ll explain why these exercises work, how to get started, and give you a simple step-by-step guide to the best beginner moves.
Why Sitting Exercises are Your New Secret Superpower
You might wonder, “Can I really get stronger just by sitting down?” The answer is yes. Chair-based fitness is an effective way to improve your strength and mobility. While others may be lifting heavy weights at the gym, you can make real progress right from your living room.
For starters, sitting exercises remove the fear of falling. Balance can be tricky as we age, and worrying about falling is a major barrier to staying active. When you are seated, that worry disappears. You can push your muscles and stretch your joints with the peace of mind that you are completely supported.
These exercises also help your circulation. If you sit for long periods, your blood flow can slow down. Moving your arms and legs while seated encourages your heart to work more efficiently, which can boost your energy and improve your sleep. It also helps keep your joints flexible. The more you move, the less stiff you’ll feel.
Preparing Your “Home Gym” (Also Known as a Chair)
Before starting the routine, let’s talk about what you need. You don’t need a fitness app or special workout clothes. The most important thing is choosing the right chair.
- Skip the Wheels: This is the most important rule. Unless you want your exercise routine to turn into an accidental trip across the kitchen, avoid office chairs with wheels.
- Choose a chair that is firm and sturdy, like a dining room or kitchen chair. Avoid soft recliners that make it hard to sit up straight. If you sink into the chair and can’t keep good posture, pick a different one.
- Feet on the Floor: Your feet should be able to rest flat on the ground. If the chair is a bit too tall, you can place a couple of sturdy books or a yoga block under your feet to bring the chair closer to the floor.
- Posture Check: Throughout these moves, try to scoot toward the front third of the chair. This forces your stomach muscles to wake up and support your spine rather than just leaning back and letting the chair do all the work.
The 10-Minute Sitting Exercise Routine
We’ll go through these exercises at a slow, steady pace. The goal is gentle effort, not exhaustion. Take deep breaths, keep water nearby, and listen to your body. If something doesn’t feel right, it’s okay to skip it.
1. Seated Marching (Strength and Cardio)
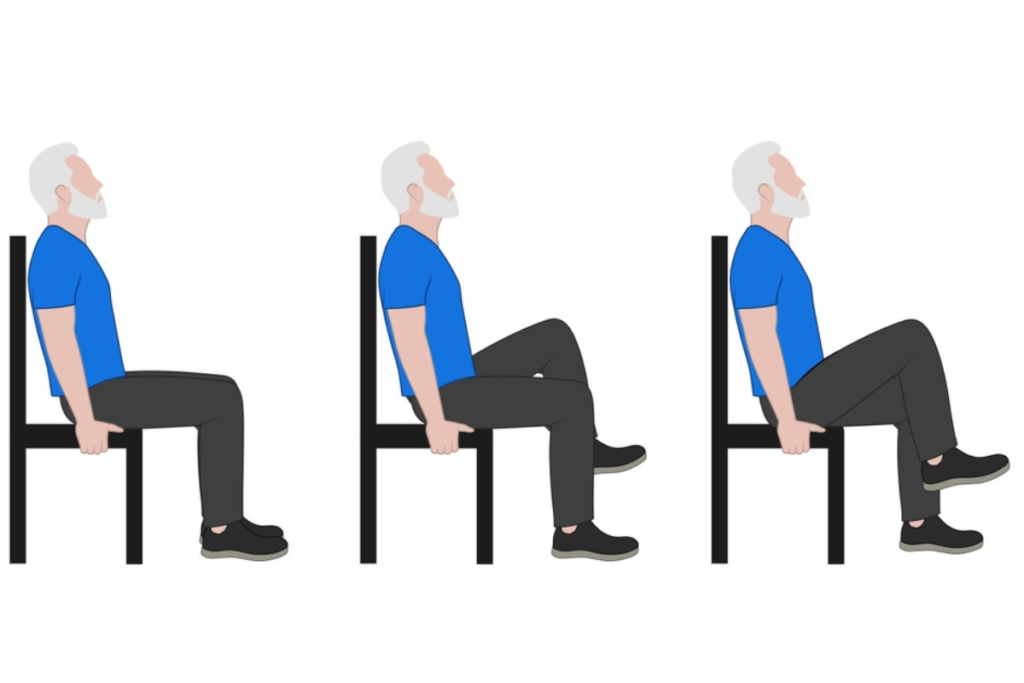
This move gets the blood flowing and works the hip flexors and lower abdominals. It is like going for a walk, but your view doesn’t change.
- Sit tall with your feet flat on the floor, about hip-width apart.
- Grip the sides of your chair for a little extra stability.
- Lift your right knee as high as is comfortable, then lower it back down with control.
- Immediately lift your left knee, then lower it.
- Continue “marching” in place for 30 to 60 seconds.
- Try to keep your back straight. If you notice yourself leaning back, return to an upright position.
2. Seated Leg Extensions (Lower Body Strength)
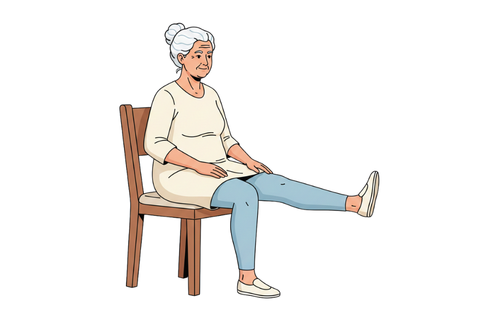
This exercise focuses on the quadriceps, the large muscles on the front of your thighs. Strong “quads” make it much easier to stand up from a chair or climb stairs.
- Sit tall and hold the sides of the chair.
- Slowly straighten your right leg out in front of you until your knee is straight (but not locked).
- Flex your toes back toward your shin. You should feel your thigh muscles working.
- Hold for two seconds, then slowly lower your foot back to the floor.
- Repeat 10 times on the right leg, then switch to the left.
3. Seated Shoulder Press (Upper Body Strength)
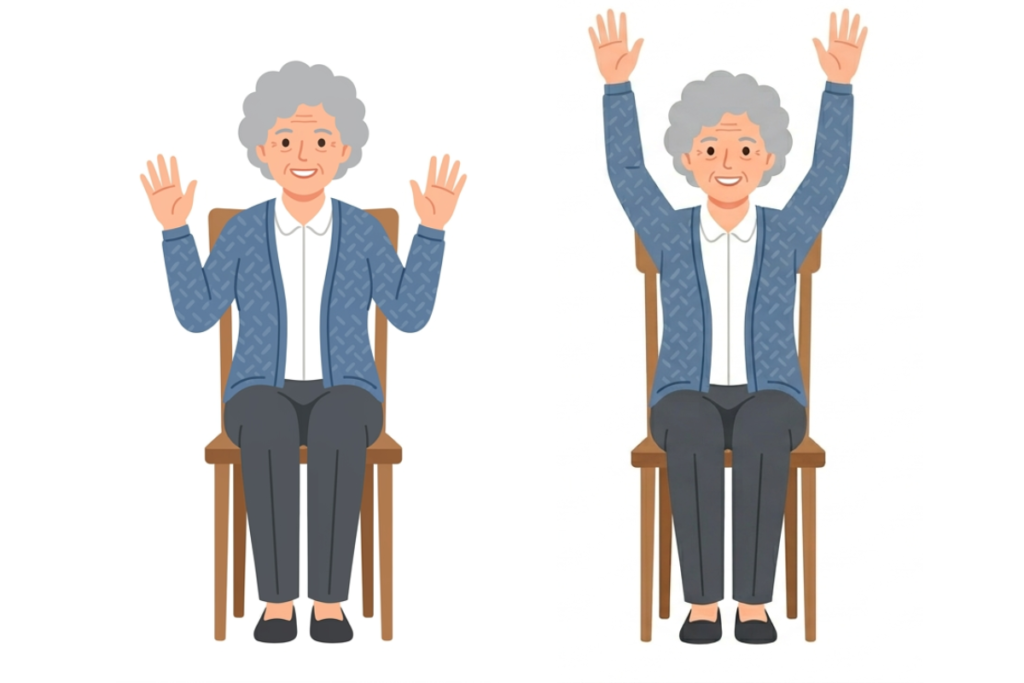
This exercise helps you keep the ability to reach for things on high shelves, which is useful in daily life.
- Sit up straight with your feet flat on the ground.
- Bring your hands up to shoulder height, palms facing forward. Your arms should look like a “goal post.”
- Slowly push your hands up toward the ceiling as if you are trying to touch the sky.
- Bring your hands back down to shoulder level with control.
- Repeat 10 to 12 times. If your shoulders feel uncomfortable, you don’t need to lift your arms all the way up. Only go as high as feels comfortable.
4. Seated Cat-Cow Stretch (Mobility)
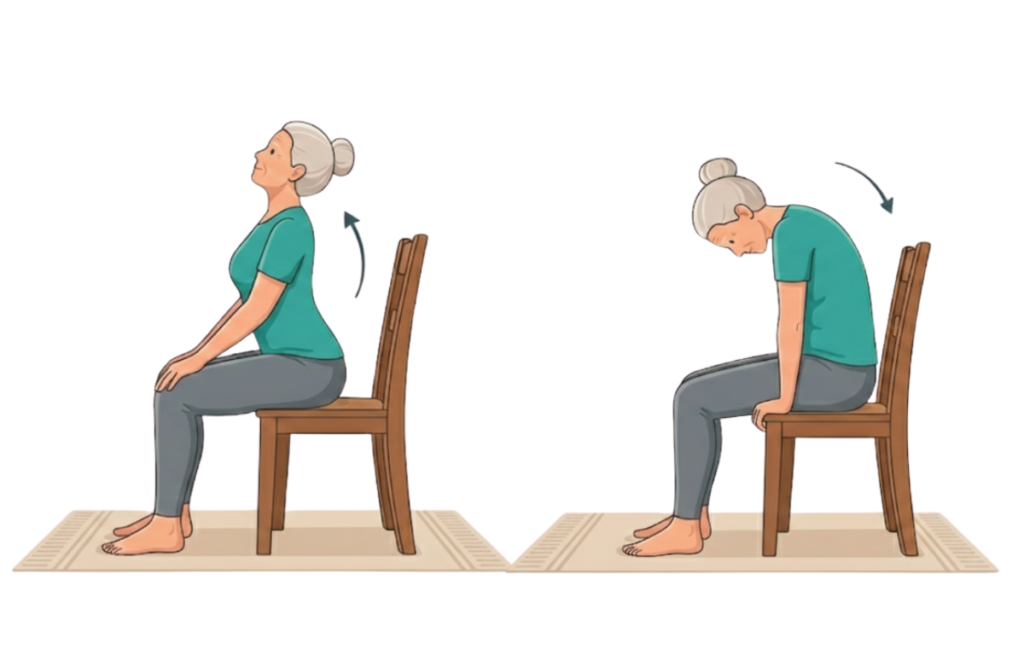
This stretch is especially helpful for a stiff back. It moves your spine in two directions to keep it flexible and healthy.
- Place your hands on your knees.
- The Cow: Inhale and lift your chest, arching your back slightly and looking up toward the ceiling.
- The Cat: Exhale and round your spine, tucking your chin toward your chest and looking down at your lap. This movement helps stretch your back muscles.
- Flow between these two positions 5 to 8 times, following your breath.
5. Seated Spinal Twist (Mobility)
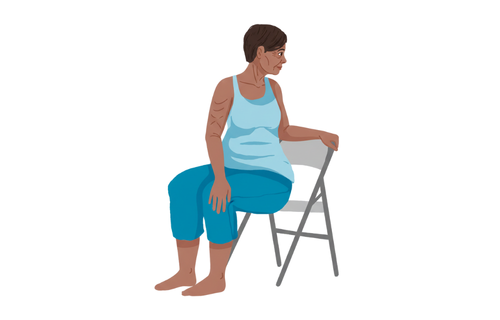
As we age, it can become harder to turn and look behind us, which can make daily tasks more difficult. This twist helps you regain that range of motion.
- Sit tall with your feet flat.
- Place your right hand on the outside of your left knee.
- Reach your left hand back and grip the armrest or the seat of the chair behind you.
- Gently turn your torso and look over your left shoulder.
- Hold for three deep breaths, then slowly unwind and repeat on the other side.
6. Seated Heel-to-Toe Raises (Balance and Stability)
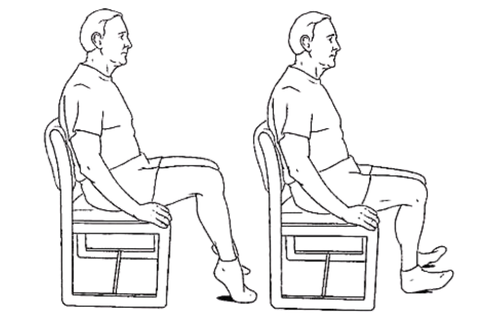
Strong ankles are important for good balance. If your ankles are stiff, it becomes harder for your body to adjust to uneven surfaces.
- Sit with your feet flat on the floor.
- Lift both heels as high as you can, coming up onto the balls of your feet. Hold for a second.
- Lower your heels, then lift your toes toward the ceiling while keeping your heels on the ground.
- Rock back and forth between heel raises and toe raises 15 times. Move at a slow, steady pace.
7. Seated Side Bends (Flexibility and Core)
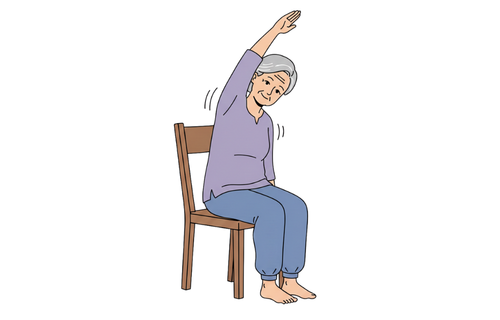
This exercise works your obliques, the muscles along the sides of your torso. It helps you reach and bend to the side more easily.
- Sit in the middle of your chair with your feet wide for a stable base.
- Let your right arm hang down toward the floor at your side.
- Slowly lean to the right, reaching your fingertips toward the floor as if you dropped your keys.
- Use your stomach muscles to pull yourself back up to a tall sitting position.
- Repeat 10 times on the right, then 10 times on the left.
8. Seated Arm Circles (Shoulder Mobility)
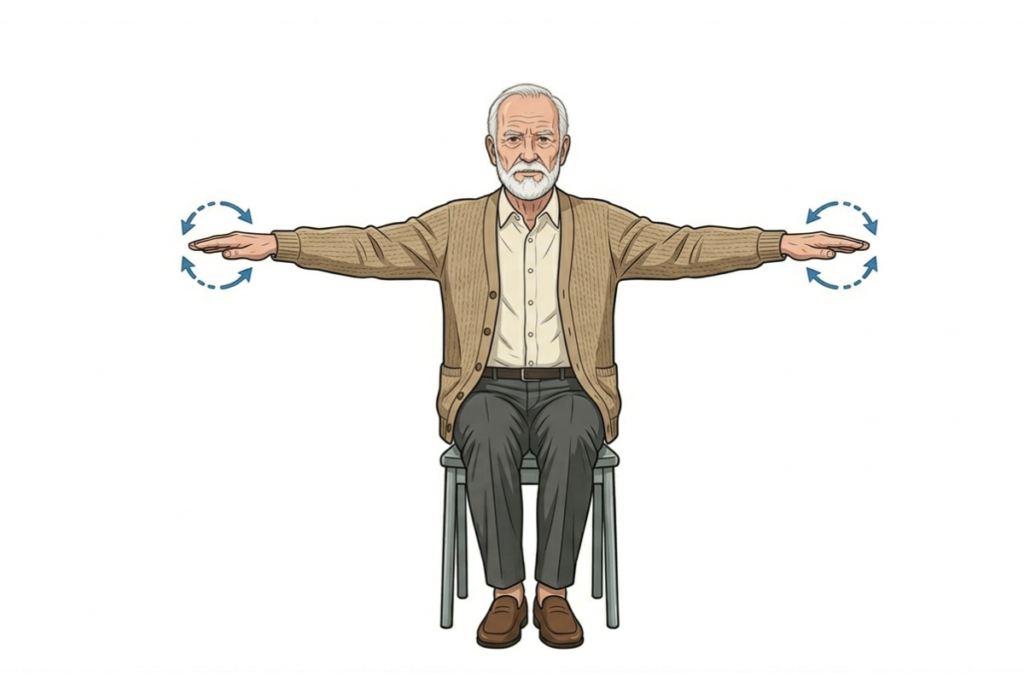
This exercise is a simple and effective way to keep your shoulder joint moving smoothly.
- Extend your arms out to the sides like airplane wings.
- Make small, controlled circles in a forward direction for 15 seconds.
- Reverse the direction and make circles backward for 15 seconds.
- If your arms get tired, make the circles smaller or take a short break. The goal is to feel your muscles working, not to overdo it.
9. Seated Hamstring Stretch (Flexibility)
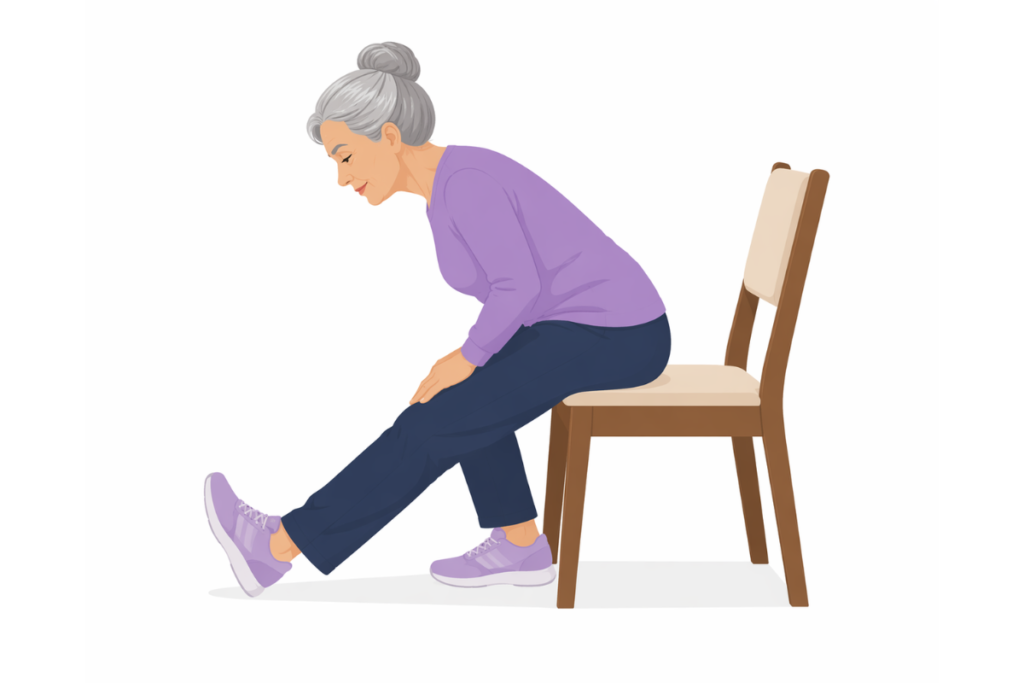
Tight hamstrings, which are the muscles at the back of your legs, can cause lower back pain. Stretching them can help your back feel better.
- Sit on the very edge of your chair.
- Extend your right leg straight out, resting your heel on the floor and pointing your toes up.
- Keep your back very straight and gently lean forward from your hips.
- Stop as soon as you feel a stretch in the back of your leg. There’s no need to touch your toes.
- Hold for 20 to 30 seconds, then switch legs.
The Secret Ingredient
The most important thing to remember is that you don’t have to be perfect at these senior-friendly seated workouts. There’s no such thing as a professional chair-exerciser. Some days you’ll have lots of energy, and other days you might only want to do a few moves. Both are completely fine.
The goal is to be consistent. Doing five minutes of these sitting exercises every day is much better for your long-term health than doing a long workout only once in a while. Treat it as a daily check-in for your body, moving the parts that feel stiff and keeping your muscles active.
Don’t worry if you hear some noises from your joints. As long as there’s no sharp pain, it’s just your body adjusting to movement. If you feel mild soreness the next day, that means your muscles are getting stronger.
Fina Thoughts
You have everything you need: your chair and the motivation to start. You don’t have to wait for a special occasion or a New Year’s resolution. Begin right now, even as you finish reading this. Try doing five seated marches to get started.
You’ve just started your fitness journey. It wasn’t difficult, didn’t cost anything, and you didn’t even need special shoes. Keep up the momentum. Your body is designed to move, and giving it a few minutes of attention each day helps you feel stronger and more confident. Keep breathing, sit tall, and keep moving. Your future self will thank you.
