
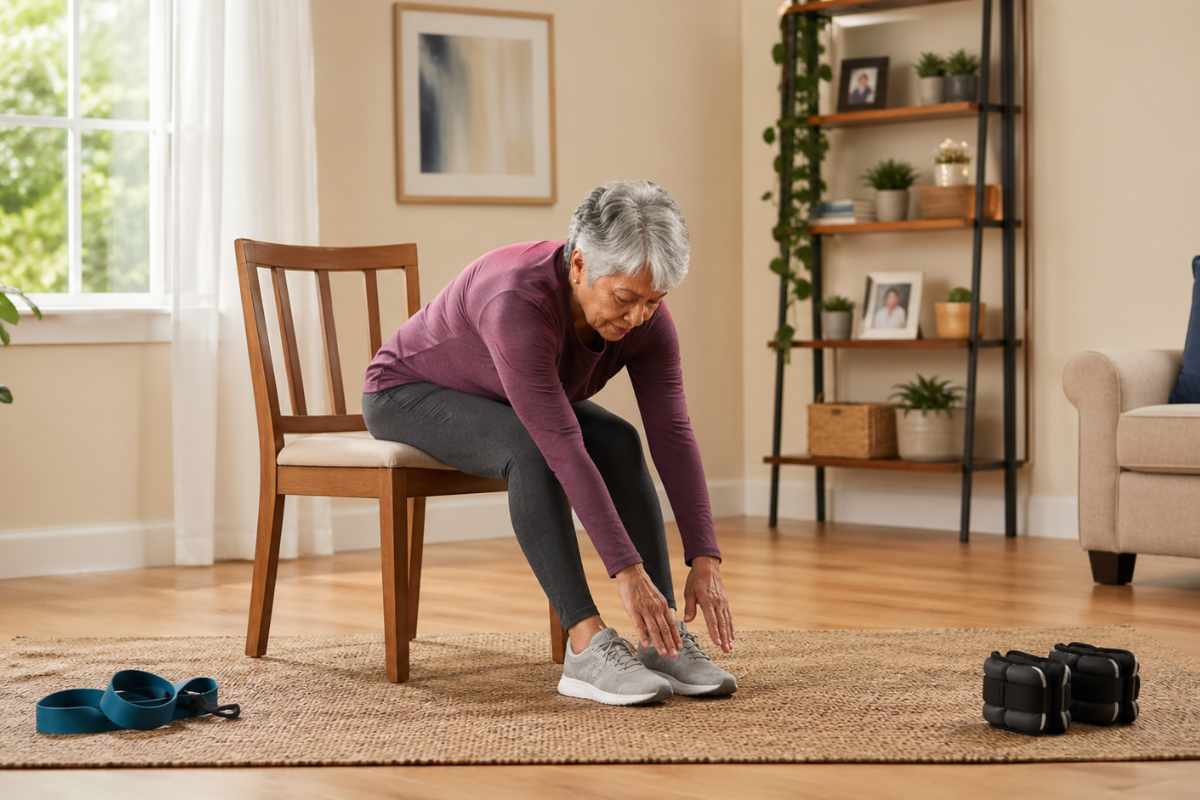
You don’t need to touch your toes, you don’t need a yoga mat, and you don’t even need to get up from your chair. If that sounds like your kind of workout, you are in exactly the right place. Gentle chair yoga for seniors is one of the best-kept secrets in the wellness world, and honestly, it deserves way more hype. It’s beginner-friendly, joint-friendly, and living-room-friendly. Whether you’re managing stiffness, recovering from an injury, or simply haven’t exercised in a while (no judgment, life happens), chair yoga meets you exactly where you are.
So grab your favorite chair, maybe a glass of water, and let’s get moving, one slow, feel-good stretch at a time.
Why Chair Yoga Is a Game-Changer for Older Adults
Here’s the honest truth: a lot of traditional exercise programs aren’t designed with seniors in mind. Getting down on the floor sounds fine in theory, until you’re wondering how you’re getting back up.
A gentle chair yoga routine for seniors solves that problem completely. All you need is a sturdy chair without wheels (safety first, no office chair adventures please), and you’re good to go.
Here’s why it works so well:
- Improves flexibility without forcing your body into awkward positions
- Builds strength in your core, arms, and legs, all while seated
- Boosts balance and coordination, which helps prevent falls
- Reduces stiffness and joint pain, especially in the hips, back, and shoulders
- Lowers stress and anxiety through slow, mindful breathing
- Accessible for almost everyone, including those with limited mobility or chronic conditions
And the best part? Even 10 to 15 minutes a day can make a real difference over time. Consistency beats intensity, every single time.
Before You Begin: A Few Quick Tips
No need to overthink this. Just keep these simple pointers in mind:
- Use a sturdy chair with a firm seat and no armrests if possible. Place it on a non-slip surface.
- Sit tall with both feet flat on the floor, hip-width apart.
- Breathe throughout every move. If you find yourself holding your breath, that’s a sign to slow down.
- Never push through sharp pain. Mild discomfort from stretching is okay; actual pain is not.
- Go at your own pace. This is not a competition. Not even with yourself.
The Beginner Chair Yoga Routine (All Seated)
Let’s walk through a simple, beginner-friendly sequence. Do each move slowly and with intention. Think of it less like a workout and more like a conversation with your body.
1. Seated Mountain Pose (Your Starting Point)
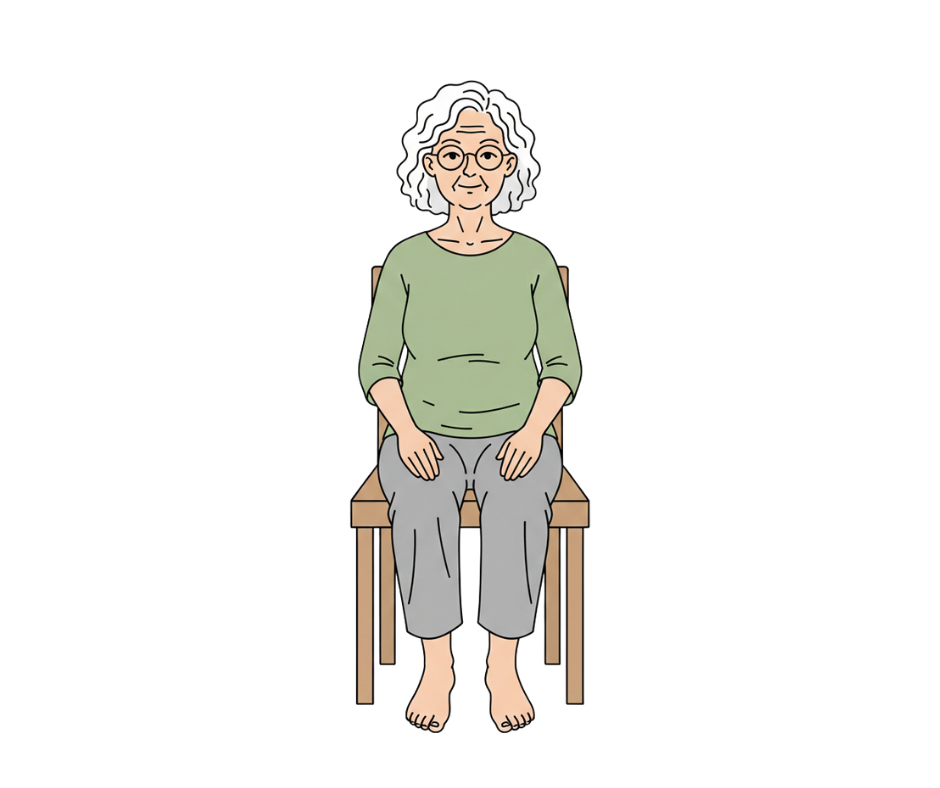
This one sounds fancy, but it’s really just sitting properly, and it sets the tone for everything else.
How to do it:
- Sit toward the front edge of your chair, not all the way back.
- Place both feet flat on the floor, hip-width apart.
- Rest your hands on your thighs, palms facing down.
- Sit up tall, imagining a string gently pulling the top of your head toward the ceiling.
- Take 3 to 5 slow, deep breaths here.
Why it helps: It activates your core, improves posture, and signals your body that it’s time to slow down and focus. It also looks very zen, which is a bonus.
2. Neck Rolls (Bye Bye, Tension)
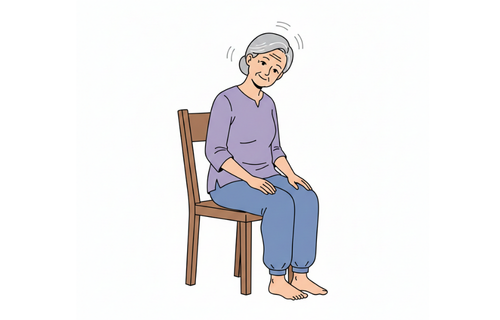
If you’ve ever sat at a computer too long or slept on your neck funny (who hasn’t), this one is for you.
How to do it:
- Sit tall in Mountain Pose.
- Slowly drop your right ear toward your right shoulder. Hold for 3 breaths.
- Gently roll your chin down toward your chest.
- Continue to the left side. Hold for 3 breaths.
- Repeat 2 to 3 times in each direction.
What to avoid: Full backward neck rolls. Keep it gentle and front-facing only.
Why it helps: Releases tension in the neck and upper shoulders, two of the body’s biggest stress-holders.
3. Seated Cat-Cow Stretch (For a Happy Spine)
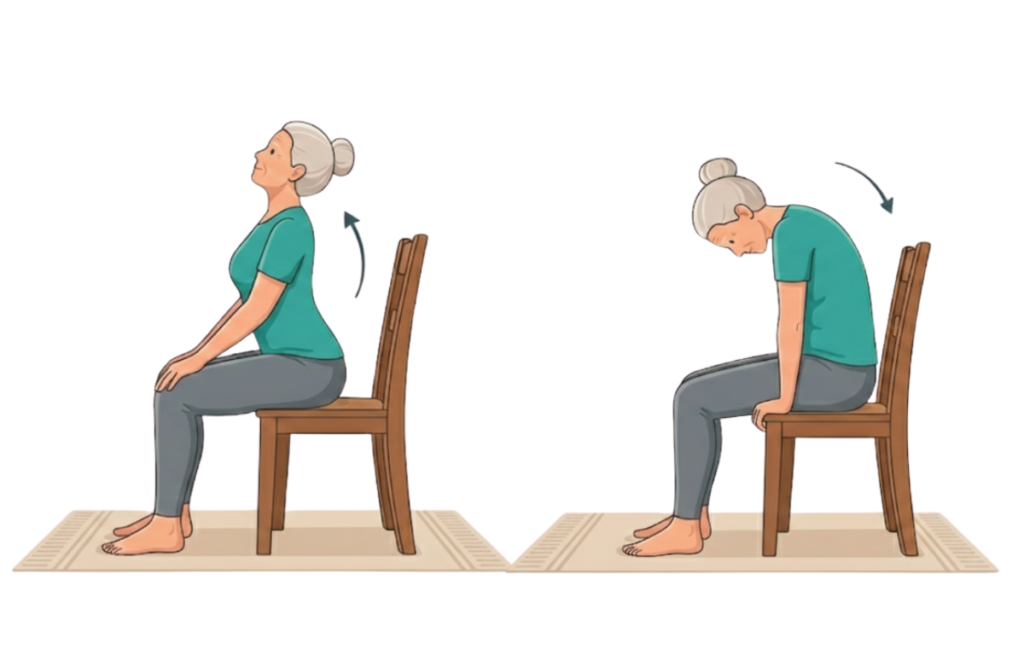
This is the classic yoga move, adapted so you never have to leave your chair.
How to do it:
- Place both hands on your knees.
- Inhale: Arch your back gently, lift your chest, and look slightly upward. (This is “Cow.”)
- Exhale: Round your spine, tuck your chin to your chest, and let your shoulders curl forward. (This is “Cat.”)
- Flow between the two slowly, matching movement to breath.
- Repeat 5 to 8 times.
Why it helps: Wakes up the entire spine, improves flexibility, and feels absolutely wonderful, especially first thing in the morning or after sitting for a long time.
4. Seated Forward Bend (A Gentle Hamstring Stretch)
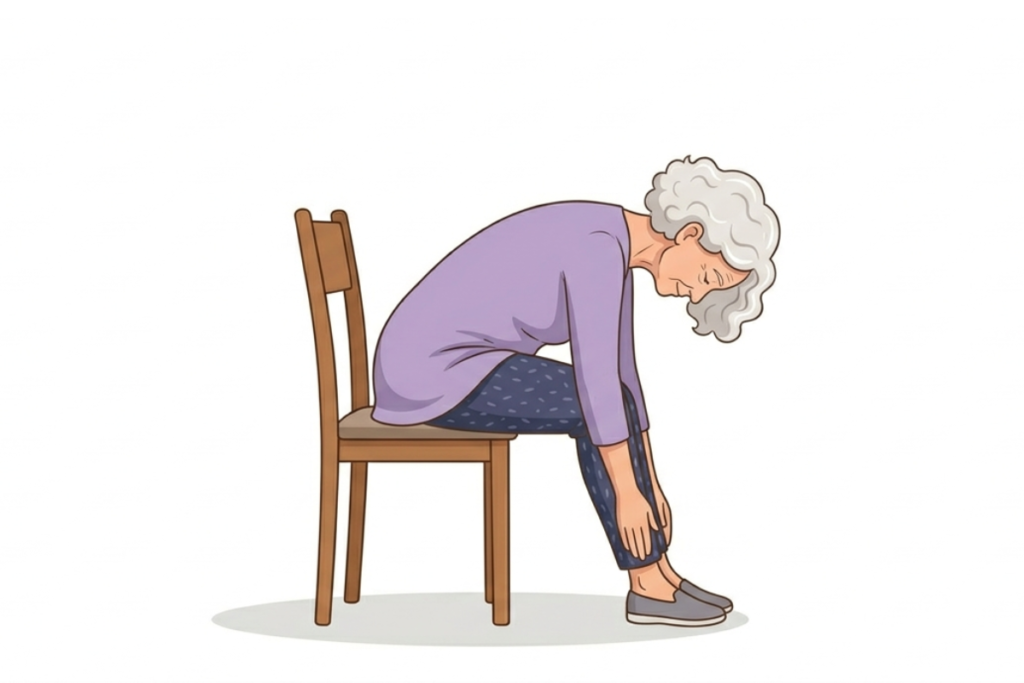
This one is great for the lower back and the backs of the legs.
How to do it:
- Sit tall at the edge of your chair with feet flat on the floor.
- Inhale and lengthen your spine.
- Exhale and slowly hinge forward from your hips (not your waist), letting your chest lower toward your thighs.
- Let your hands rest on your shins or dangle toward the floor.
- Hold for 3 to 5 breaths, then slowly rise back up.
Tip: Keep a soft bend in your knees. You don’t need to fold all the way. Even a small lean forward counts.
Why it helps: Stretches the lower back and hamstrings, two areas that tend to get tight from sitting.
5. Seated Warrior Arms (Upper Body Strength)
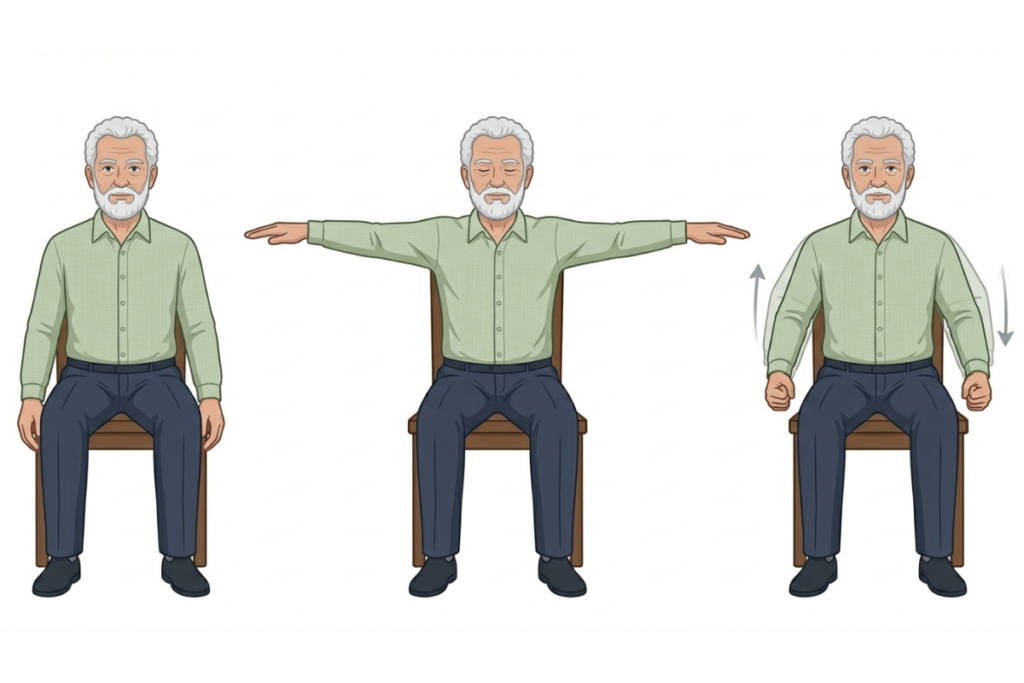
Time to build a little strength! No dumbbells needed.
How to do it:
- Sit tall with feet flat on the floor.
- Inhale and raise both arms out to the sides at shoulder height, palms facing down.
- Make gentle fists and slowly pulse your arms upward and downward in a small range of motion, about 3 to 4 inches.
- Continue for 10 to 15 pulses, breathing steadily.
- Lower your arms and rest. Repeat 2 to 3 times.
Why it helps: Strengthens the shoulders, upper back, and arms without any equipment or joint strain.
6. Seated Ankle Circles (For Circulation and Balance)
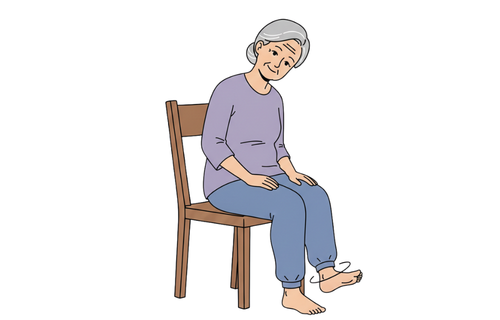
Small movement, big benefits.
How to do it:
- Sit tall and lift your right foot slightly off the floor.
- Slowly rotate your ankle in circles: 5 clockwise, then 5 counterclockwise.
- Lower and switch to the left foot.
Why it helps: Improves circulation in the lower legs and feet, reduces swelling, and supports ankle stability, which plays a big role in preventing falls.
7. Closing Breath (End on a Calm Note)
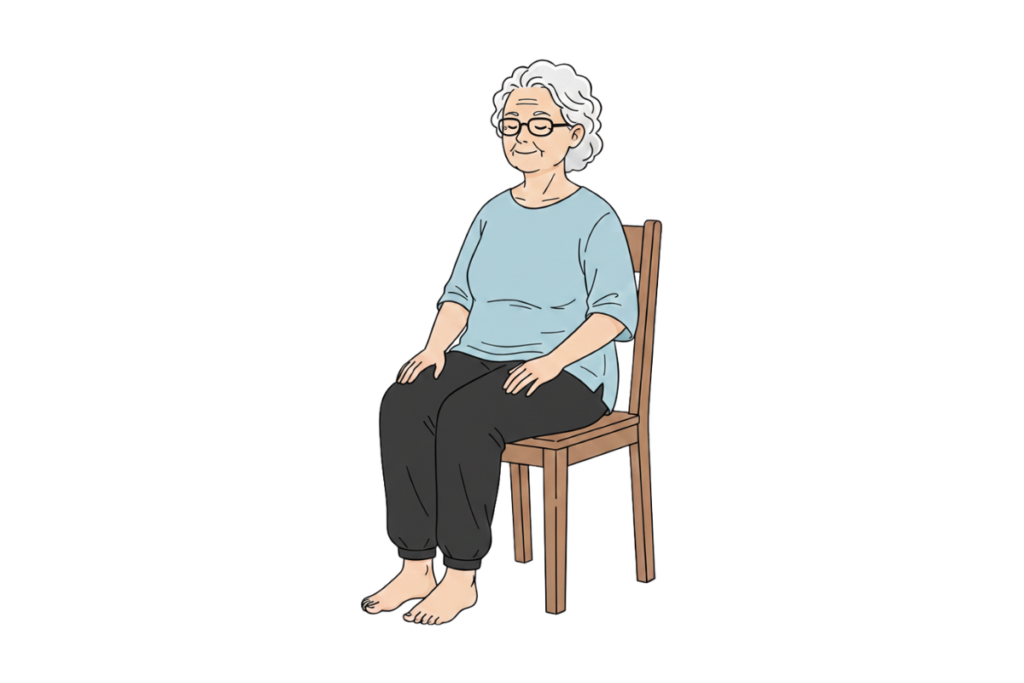
Always finish with a moment of stillness. Your body deserves it.
How to do it:
- Return to Seated Mountain Pose.
- Close your eyes if that feels comfortable.
- Take 5 slow, deep breaths. Inhale for 4 counts, exhale for 6 counts.
- Gently open your eyes when you’re ready.
Why it helps: Activates the parasympathetic nervous system (the “rest and digest” mode), lowers stress, and leaves you feeling calm and refreshed.
How Often Should You Practice?
You don’t need to carve out an hour. Even 10 to 15 minutes a few times a week is a wonderful starting point. Here’s a simple approach that works for most beginners:
- Week 1 to 2: Try the routine 2 to 3 times per week.
- Week 3 to 4: Increase to 4 to 5 times per week if it feels good.
- Ongoing: Aim for daily practice, even if it’s just 5 minutes of breathing and neck rolls.
Remember: the goal is not perfection. The goal is just showing up. Even on the days you don’t feel like it, doing one or two poses is infinitely better than doing none.
Final Thoughts
Getting started is always the hardest part. But you’ve already done that just by reading this far. That counts for something.
Gentle chair yoga exercises are not about becoming a flexible yoga master. It’s about taking care of your body in a way that feels kind, sustainable, and genuinely enjoyable. It’s about waking up with a little less stiffness, moving through your day with a bit more ease, and feeling good in the body you have right now.
So push that chair back from the table, sit up tall, and take one deep breath. You’ve already started. And starting is everything. You’ve got this!
