Traditional squats can seem intimidating, especially if your knees aren’t what they used to be. The good news is you don’t have to push yourself too hard to build stronger legs and better balance. Chair yoga squats offer a friendlier, gentler way to get the same benefits, without worrying about getting stuck on the floor.
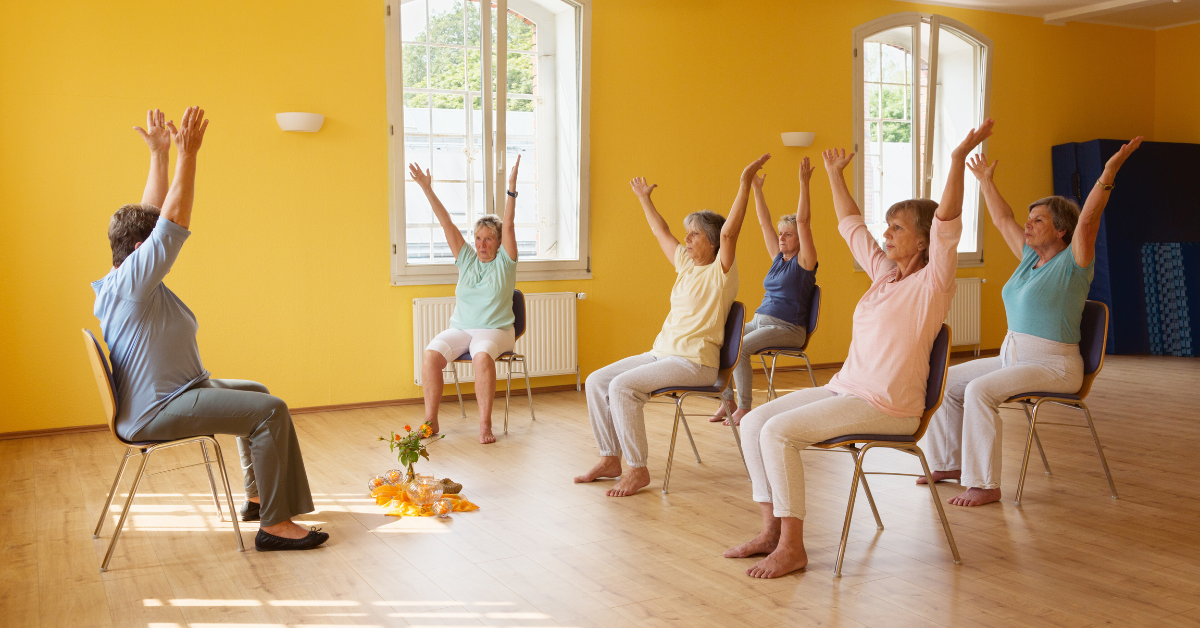
Chair yoga squats are great for older adults, beginners, or anyone looking to build strength safely. They improve leg strength, balance, flexibility, and mobility, all with the help of a sturdy chair for support. Your chair is like a workout buddy that’s always there to help you.
If you’re new to exercise or returning after a break, chair-assisted squats are a great way to begin. You don’t need special equipment or a gym membership—just a sturdy chair and the motivation to get started.
What Are Chair Yoga Squats and Why Should You Care?
Chair yoga squats are modified squats that use a chair for balance and support. Instead of squatting all the way down unsupported, use the chair as a guide: gently lower yourself toward the seat and stand back up with control.
Here’s why they’re worth your time:
Builds Leg Strength: Your quads, hamstrings, and glutes get a solid workout, which helps with everyday activities like standing up, walking, and climbing stairs.
Improves Balance: Using the chair builds confidence while still challenging your balance muscles.
Increases Flexibility: The squatting motion helps maintain hip and ankle mobility, keeping you moving smoothly.
Low Impact: Easy on the joints, making them perfect for people with arthritis or knee concerns.
Boosts Confidence: Starting with chair support means you can build strength gradually without feeling overwhelmed.
You can do these exercises anywhere you have a chair, so there’s no need to worry about making time for the gym.
Benefits of Chair-Assisted Squats for Seniors
Let’s take a closer look at why chair yoga squats are such a beneficial addition to your daily routine. Many seniors find it helpful to follow a chair yoga book for seniors for guidance, especially when learning step-by-step chair yoga squats to build strength safely and effectively.
Stronger Legs Mean Better Independence
Strong legs are important for more than just appearance. They help you stay independent as you get older. Chair squats strengthen the muscles you use to get up from the toilet, out of bed, or in and out of the car. In other words, they prepare you for everyday activities.
Better Balance Reduces Fall Risk
Falls become more serious as we age, but building leg strength and balance can greatly lower your risk. Chair squats help your body control movement, leading to steadier walking and quicker reactions if you lose your balance.
Joint-Friendly Exercise
Unlike high-impact exercises, chair squats are gentle on your knees, hips, and ankles. The chair provides support exactly when you need it, allowing you to strengthen muscles without stressing your joints.
Easy to Modify
If you feel strong, you can lower yourself a bit more. On days when you’re tired, keep the movement smaller. Chair squats can be adjusted to match your energy level, making them a flexible exercise.
How to Do Chair Yoga Squats Safely: Step-by-Step Guide
Ready to get started? Here’s your complete guide to doing chair-assisted squats the right way.
Before You Begin: Chair Setup
Before you begin, make sure you are set up for success.
Choose the Right Chair: Use a sturdy, non-wheeled chair that will not slide. Kitchen or dining chairs work well. Avoid office chairs with wheels to prevent slipping during the exercise.
Check the Height: Your chair should let your thighs be about parallel to the floor when you sit. If the chair is too low or too high, use cushions to adjust the height.
Clear the Space: Make sure you have a few feet of space around the chair so you can move freely without bumping into furniture.
The Basic Chair Squat (Beginner-Friendly)
This is your starting point. Master this version before trying anything fancier.
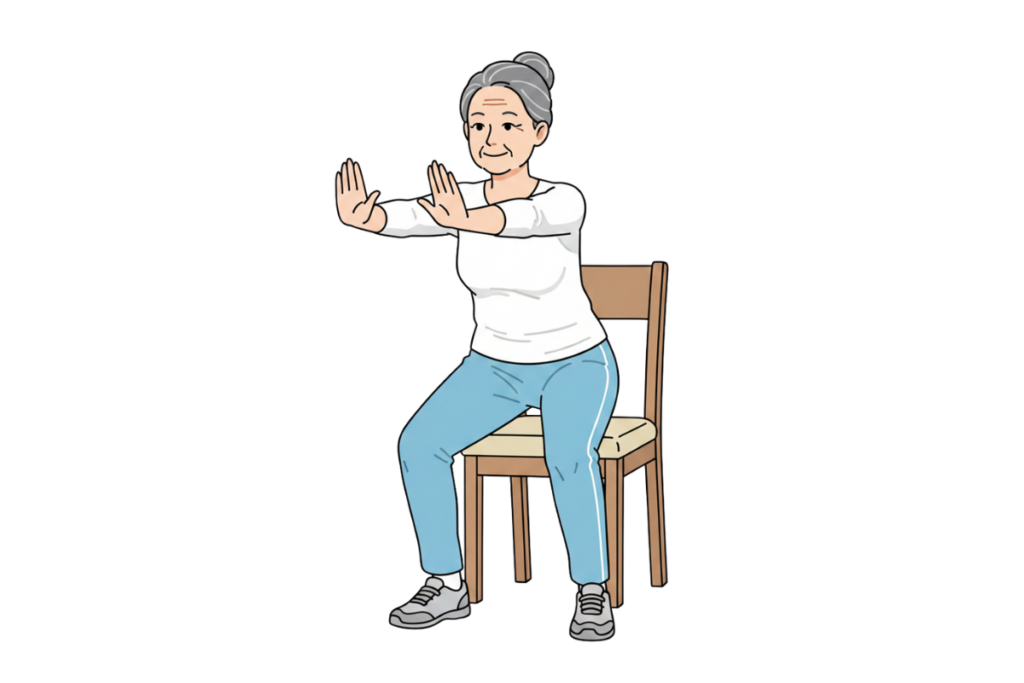
Step 1: Stand Tall
Stand in front of your chair, facing away from it. Your feet should be hip-width apart (imagine a small lane between your feet). Keep your toes pointing forward or slightly outward, whatever feels natural.
Step 2: Extend Your Arms
Reach your arms straight out in front of you at shoulder height. This helps you balance and prevents you from leaning forward too much. Your arms act as a natural counterweight.
Step 3: Start the Squat
Slowly bend your knees and push your hips back, like you’re about to sit down. Keep your chest lifted and your back straight. Don’t round your shoulders forward.
Step 4: Touch and Go
Gently lower yourself until your bottom just touches the chair seat, but do not sit down. Lightly touch the chair, then stand back up right away.
Step 5: Stand Back Up
Push through your heels to stand back up to your starting position. Squeeze your glutes (butt muscles) at the top. That’s one rep!
Step 6: Repeat
Start with 5 to 8 repetitions. Rest for a minute, then try another set if you’re feeling up to it.
Hands-on-Chair Squat (Extra Support Version)
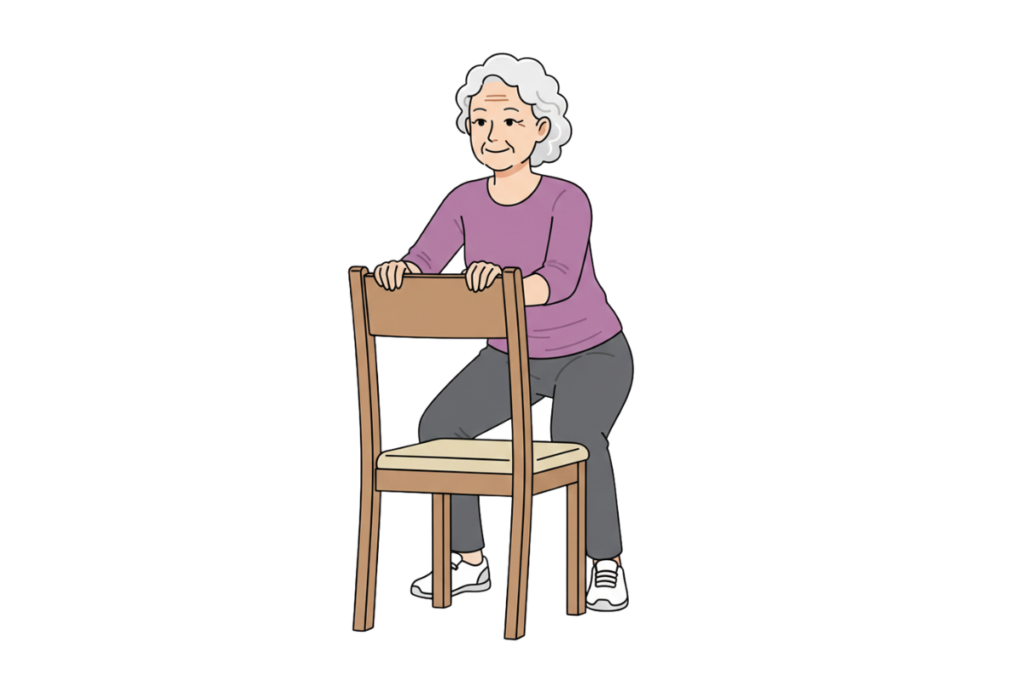
If the basic version feels wobbly, try this modification for extra stability.
Step 1: Position Yourself
Stand facing the back of the chair and hold the top edge with both hands. Keep a gentle grip. The chair is for balance, not for supporting your full weight.
Step 2: Set Your Feet
Step back slightly so your arms are extended but not locked. Feet should be hip-width apart.
Step 3: Squat Down
Bend your knees and lower your hips, keeping your weight in your heels. Only go as low as feels comfortable. Even a small bend in your knees is helpful.
Step 4: Return to Standing
Press through your heels to stand back up. Keep holding the chair for balance.
Step 5: Repeat
Try 5 to 10 repetitions, focusing on smooth, controlled movement.
This version helps you build confidence before moving on to the hands-free version.
Common Mistakes to Avoid (So You Don’t Hurt Yourself)
Even simple exercises can cause problems if you are not careful. Watch out for these common mistakes:
Letting Your Knees Cave Inward: Your knees should track over your toes, not collapse toward each other. If this happens, try widening your stance slightly.
Rounding Your Back: Keep your chest up and spine neutral. Imagine a string pulling the top of your head toward the ceiling.
Going Too Fast: Slow and steady wins the race here. Rushing increases injury risk and reduces the effectiveness of the exercise.
Forgetting to Breathe: Breathe in as you lower down, breathe out as you stand up. Don’t hold your breath or you might get lightheaded.
Skipping the Warm-Up: Spend 3 to 5 minutes marching in place or doing leg swings before starting squats. Warming up helps prevent injury.
Tips for Building Strength Safely
Keep in mind, you do not need to train like an athlete. Here are some tips to help you progress safely:
Start Small: Doing just 5 squats a day is better than none. Being consistent is more important than doing a lot at once.
Add Repetitions Gradually: Once 8 reps feel easy, try 10. Then 12. Your muscles need time to adapt.
Practice Daily (or Close to It): Doing chair squats 3 to 5 times per week will show results faster than once a week.
Listen to Your Body: A little muscle fatigue is normal. Sharp pain is not. If something hurts, stop and reassess your form.
Celebrate Progress: If you did one more repetition than last week, that is something to be proud of. Progress may be gradual, and that is completely normal.
Frequently Asked Questions
How many chair squats should seniors do daily?
Start with 5 to 8 squats, 1 to 2 times per day. As you get stronger, work up to 10 to 15 squats, 2 to 3 times per day. Quality always beats quantity.
Are chair squats safe if I have knee pain?
Chair squats are generally gentle on knees, but check with your doctor first if you have existing knee issues. You can also try smaller movements (quarter squats) to reduce stress on the knees.
How long before I notice results?
Most people notice improved strength and balance within 2 to 4 weeks of consistent practice. Remember, slow and steady progress is still progress!
Final Thoughts
The truth is, you do not need to be a fitness expert or extremely flexible to get stronger and improve your balance. Chair yoga squats show that effective exercise can be simple, safe, and accessible for everyone.
Your chair can be more than just a place to sit. It can help you build stronger legs and better balance. All you need to do is try. Even a few squats today is progress, and that is something to be proud of.
So take your chair, stand up straight, and give it a try. Your future self will thank you. You can do this!