

Our shoulders work hard every day. Whether you’re reaching for a hidden snack, hugging your grandkids, or zipping up a tricky jacket, your shoulders help you do it all. Sometimes, though, they can feel stiff and creaky. If you’ve ever groaned just reaching for the TV remote, you’re not alone. The best part is, you don’t need a gym membership or special gear to get your shoulders moving again. Adding seated shoulder exercises for seniors to your routine can help you build strength and flexibility without standing.
Your shoulders are key to staying mobile. When they’re stiff or weak, even simple tasks like driving or brushing your hair can feel tough. Chair yoga and seated exercises are an easy way to care for your body. The goal is to move with ease, even if you feel a little stiff at first.
Why Shoulder Mobility Matters as We Get Older
As we get older, our joints can lose some of their natural flexibility. It’s similar to how an older car needs more time to get going in the morning. For seniors, keeping your shoulders strong isn’t about building big muscles—it’s about staying independent.
Strong shoulders help with:
- Balance: Believe it or not, your upper body plays a huge role in keeping you steady on your feet.
- Posture: Stronger muscles prevent that “slump” that happens after a long afternoon of reading or scrolling.
- Pain Reduction: Keeping muscles active helps support bones and reduces the “snap, crackle, and pop” sounds your joints might make.
The best part is you can do these seated shoulder workouts for older adults while watching your favorite show or waiting for your tea to brew.
Setting Up Your “Home Studio” (The Chair)
Before we get started, let’s talk about what you need. You don’t need special equipment—just a chair. But it’s important to pick the right kind of chair.
- Skip the wheels: Unless you want to turn your workout into an accidental race across the kitchen, use a sturdy, stationary chair.
- Ditch the deep sofa: You want a chair that allows you to sit up tall. If you sink three inches into the cushion, it will be hard to move your arms.
- Flat feet: Make sure your feet can touch the floor. If you are on the shorter side, tuck a couple of sturdy books or a small stool under your feet.
Sit toward the front edge of the chair, so your back isn’t leaning against the rest. This engages your core and makes you feel like a proper athlete. Or at least like someone who is very serious about their seated stretches.
The Ultimate Beginner Shoulder Routine
Here’s a simple step-by-step guide to some great beginner moves. If you feel pain, stop right away. You should feel a gentle stretch, not strong discomfort.
1. Shoulder Scapular Circles
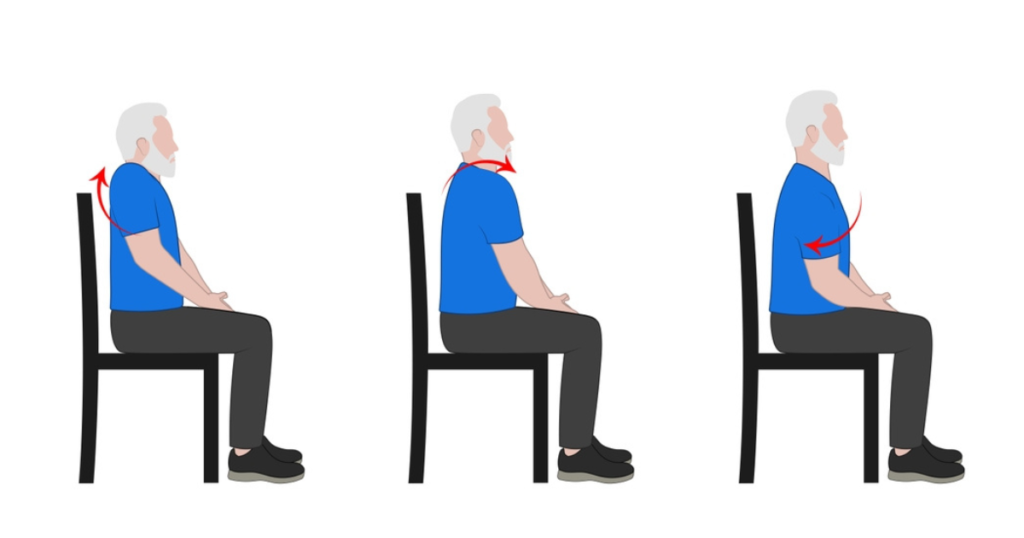
This is the classic “warm-up” move. It releases tension in the trapezius muscles and gets the joint fluid moving.
- Step 1: Sit tall with your arms hanging loosely by your sides and your palms facing your thighs.
- Step 2: Inhale and lift your shoulders up toward your ears as high as they will go.
- Step 3: Slowly roll your shoulders back, squeezing your shoulder blades together.
- Step 4: Exhale as you slide your shoulders down away from your ears.
- Step 5: Repeat 10 times in a clockwise motion, then reverse for 10 more.
2. Seated Scapular Retraction (The Squeeze)
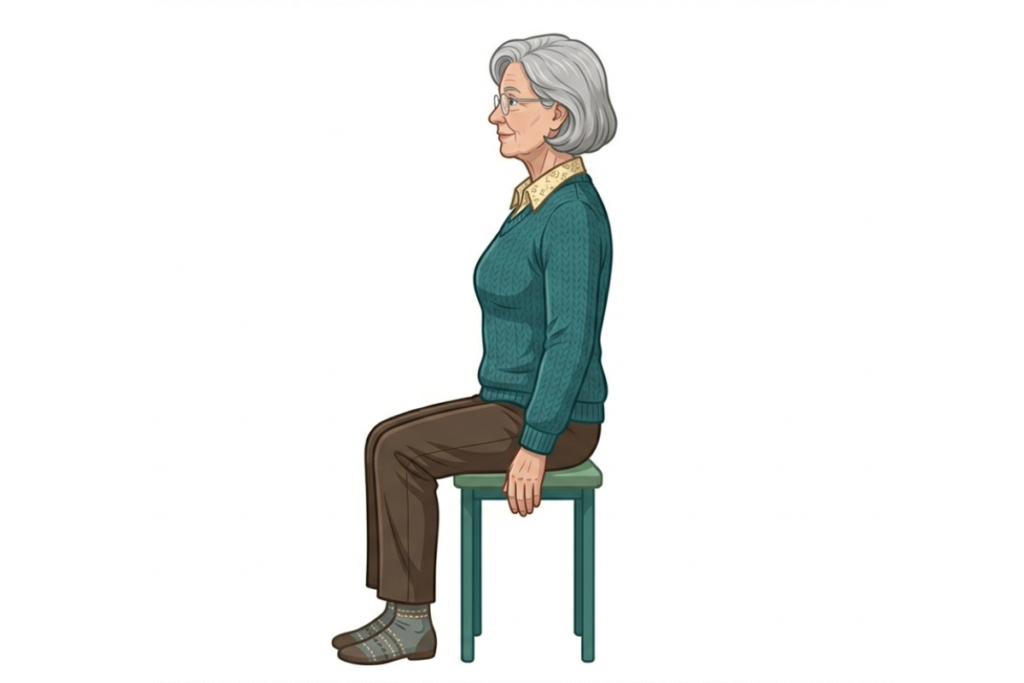
This exercise focuses on the rhomboids and the middle trapezius, the muscles that keep you standing (or sitting) tall.
- Step 1: Sit at the edge of your chair with your spine straight.
- Step 3: While keeping your arms tucked close to your ribs, slowly pull them back.
- Step 4: Imagine there is a pencil between your shoulder blades; squeeze them together to “hold” the pencil.
- Step 5: Hold the squeeze for 3 seconds, then slowly return to the starting position. Repeat 10 times.
3. Seated Shoulder Abduction (Lateral Raises)
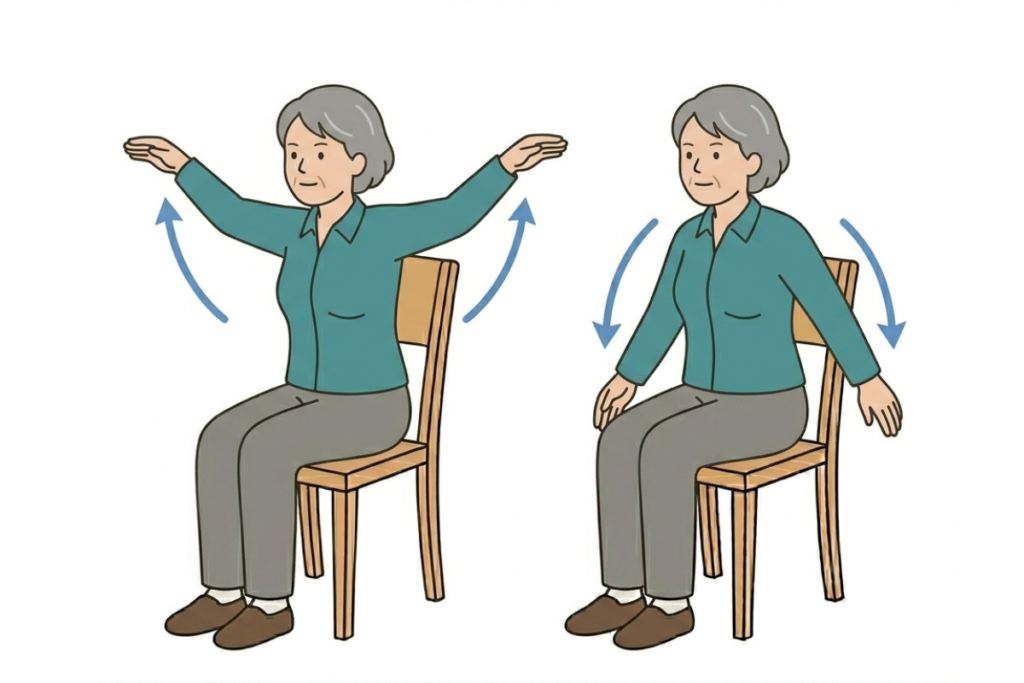
This move strengthens the deltoids, which are the rounded muscles on the tops of your shoulders.
- Step 1: Let your arms hang at your sides, palms facing inward toward the chair.
- Step 2: Keep a very slight bend in your elbows so they aren’t locked.
- Step 3: Slowly lift both arms out to the sides until they are level with your shoulders (forming a “T” shape).
- Step 4: Pause for a second at the top, then slowly lower them back down to your sides.
- Step 5: Complete 10 repetitions. If this feels too easy, try holding a small water bottle in each hand.
4. Seated Shoulder Flexion (Front Raises)
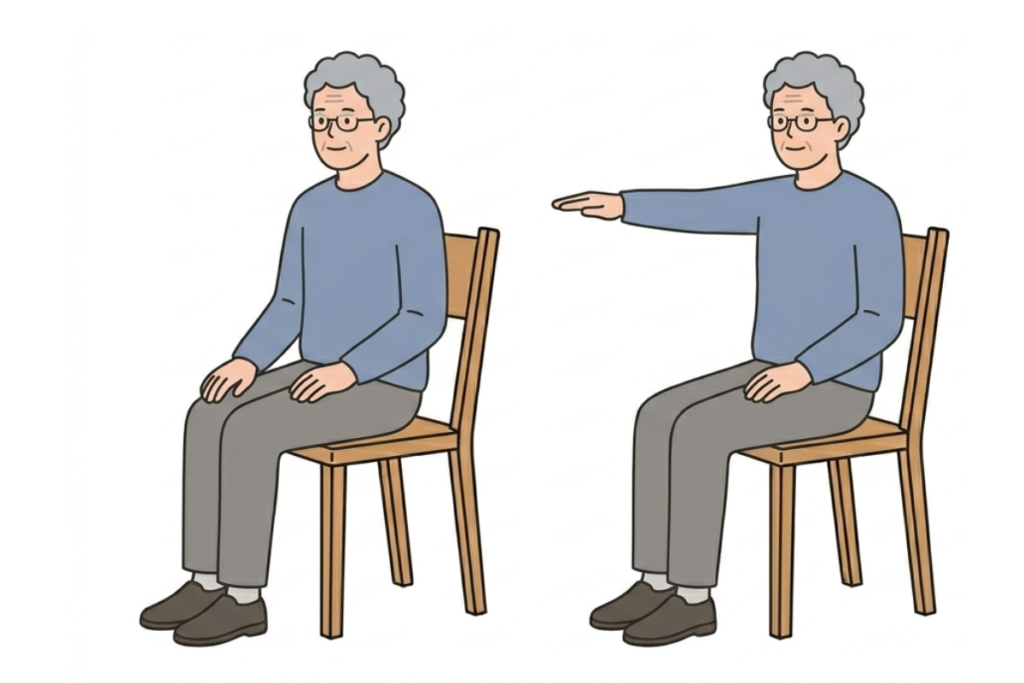
This helps with the forward-reaching motion we use for putting things away in cupboards.
- Step 1: Start with your arms at your sides, palms facing your legs.
- Step 2: Slowly lift your right arm straight out in front of you until it is level with your shoulder.
- Step 3: Lower it back down with control. Do not let gravity do the work!
- Step 4: Repeat the motion with your left arm.
- Step 5: Alternate back and forth for a total of 20 repetitions (10 on each side).
Tips for Staying Consistent
We’ve all started a new routine with lots of excitement, only to forget about it a few days later. Staying consistent is more important than doing a long workout once in a while.
- Tie it to a habit: Do your shoulder rolls every time the commercials come on during the news. Or do your goalpost stretches while you wait for the coffee to brew.
- The “Two-Minute Rule”: If you really don’t feel like doing the whole routine, just do one move for two minutes. Usually, once you start, you’ll feel good enough to finish.
- Celebrate small victories. If you can reach a high shelf more easily next week, give yourself a pat on the back. That pat is also a good shoulder stretch!
Listen to Your Body
As a beginner, remember to listen to your body. Some days you’ll feel great, and other days you might feel a bit stiff. That’s completely normal.
If you feel sharp pain, stop the exercise. If one side feels tighter, spend a little more time on it and take slow, deep breaths. The goal is to make progress, not to be perfect. You’re working toward moving more easily and feeling comfortable every day.
Final Thoughts
Starting a new fitness routine is often the hardest step. It’s easy to put it off or think you’re too stiff, but stiffness won’t go away unless you start moving. You don’t have to do every exercise today. Just choose one. Even doing five slow shoulder rolls right now is a win for today.
By adding these seated exercises for shoulder strength in seniors to your daily routine, you’re helping your future self. You’re choosing to be more mobile, stronger, and ready for new activities. Sit up straight, take a deep breath, and move your shoulders. You can do this!
