

Have you ever reached for the remote and felt your spine make a sound like Rice Krispies—snap, crackle, and pop? If you groan every time you stand up or your lower back feels stiff as a board, you are not alone. The good news is you do not need to join a tough gym class or try complicated stretches to feel better. Some of the best seated lower back exercises for seniors can be done right from your favorite sturdy kitchen chair or armchair.
As we get older, stiffness can make simple tasks like tying our shoes or gardening feel much harder. The good news is your body still wants to move—it just needs a gentle push. This guide will help you regain some flexibility and get rid of that stiff feeling. We focus on chair yoga and seated movements because they are safe, effective, and you do not need any special gear. Let’s start moving again, one gentle stretch at a time.
Why Your Back is Grumpy (and Why the Chair is Your Best Friend)
Before we start the exercises, let’s talk about why sitting is helpful. Over the years, gravity compresses our spines. Add in some arthritis or the normal wear and tear of life, and the lower back often feels it the most.
Traditional floor yoga is great, but let’s be honest: for many of us, the hardest part of floor yoga is actually getting back up off the floor. Using a chair removes the fear of falling from the equation. It provides a stable base so you can focus entirely on your back and hips without worrying about your balance. It is essentially the “safety first” version of fitness, and it works wonders.
Getting Your “Gym” Ready
You do not need a fancy home gym. Just a few basics will help you stay safe and comfortable:
- The Chair: Use a sturdy chair without wheels. A dining room chair or a kitchen chair is usually perfect. Avoid anything too “squishy” like a deep sofa, as it will make it hard to keep your spine straight.
- The Shoes: Wear supportive, flat shoes or go barefoot if your floor isn’t slippery. No high heels or floppy slippers here.
- The Space: Make sure you have enough room to move your arms out to the sides and slightly forward.
- The Mindset: Do not worry about being perfect. Aim to feel better than you did ten minutes ago, not to win a gold medal.
10 Gentle Seated Lower Back Exercises for Seniors
Here are ten moves to help loosen your lower back. Remember to breathe during each one. If something hurts, stop. A gentle stretch is good, but sharp pain means you should skip that move for now.
1. The Seated Cat-Cow
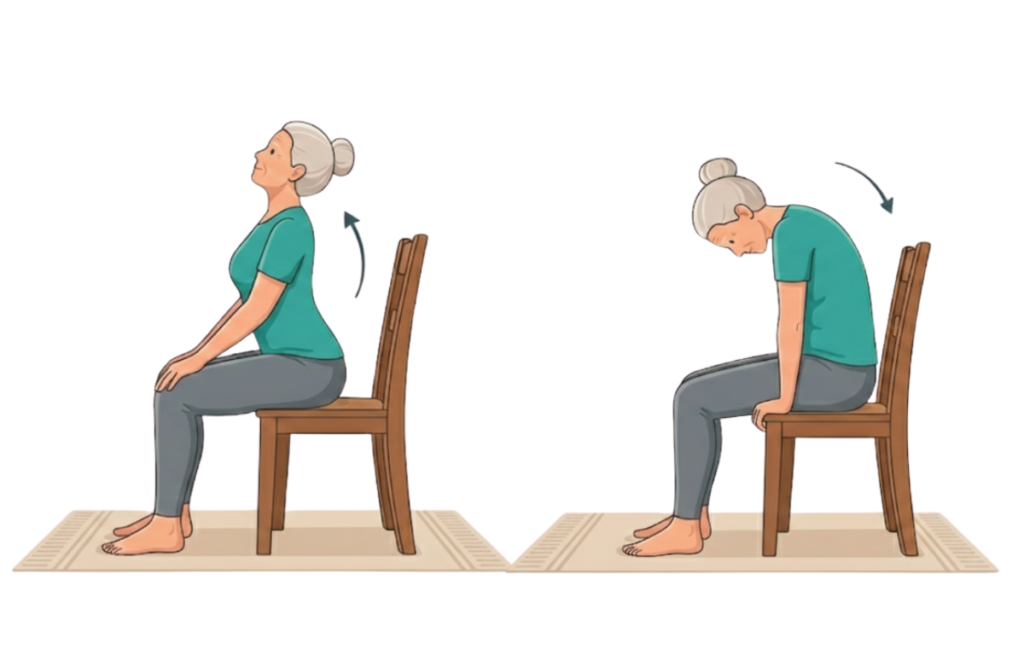
This exercise is great for back health. It helps wake up your whole spine and creates space between the vertebrae.
- Step 1: Sit toward the front edge of your chair with your feet flat on the floor, about hip-width apart.
- Step 2: Place your hands on your knees.
- Step 3 (The Cow): Inhale slowly while lifting your chest and looking slightly upward. Allow your back to arch gently.
- Step 4 (The Cat): Exhale and round your spine like a grumpy Halloween cat. Tuck your chin toward your chest and look toward your belly button.
- Repeat: Do this 5 to 10 times. It should feel like a wave moving through your back.
2. The Seated Twist (The Corkscrew Lite)
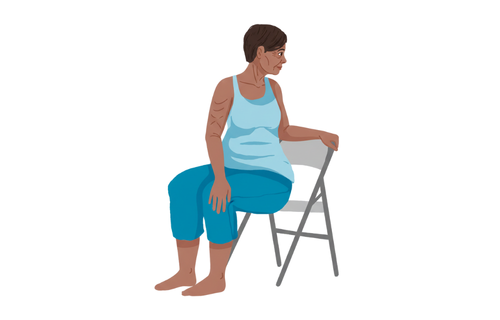
Twisting helps release tension in your back. Imagine it as gently squeezing water out of a sponge.
- Step 1: Sit tall with your feet firmly planted.
- Step 2: Place your right hand on the outside of your left knee and your left hand on the arm or seat of the chair behind you.
- Step 3: Inhale to sit even taller, then exhale as you gently turn your torso to the left.
- Step 4: Hold for three breaths, then slowly return to the center and repeat on the other side.
Note: Keep your hips facing forward. The twist should occur in your middle and upper back, relieving pressure on your lower back.
3. The Seated Forward Fold
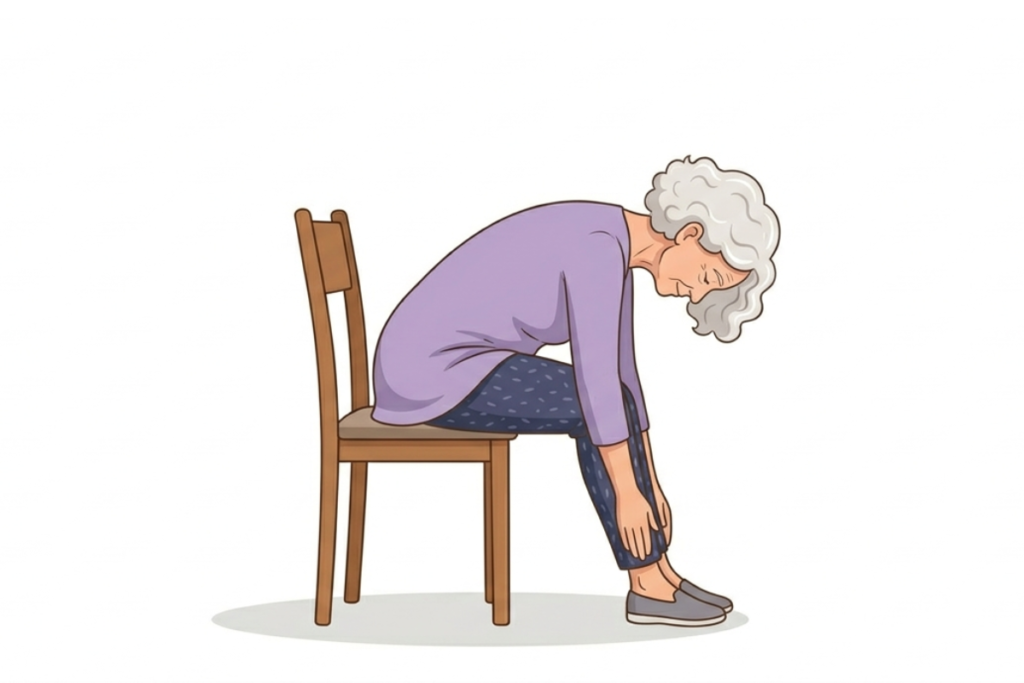
This move lets gravity help you stretch.
- Step 1: Sit with your feet a bit wider than your hips.
- Step 2: Place your hands on your thighs for support.
- Step 3: Slowly lean forward, sliding your hands down your legs toward your shins or ankles.
- Step 4: Only go as far as is comfortable. Let your head hang heavy if that feels okay for your neck.
- Step 5: Take a few deep breaths into your lower back, then slowly use your hands to “walk” your torso back up to a sitting position.
4. The Side Stretch (The High Shelf Reach)
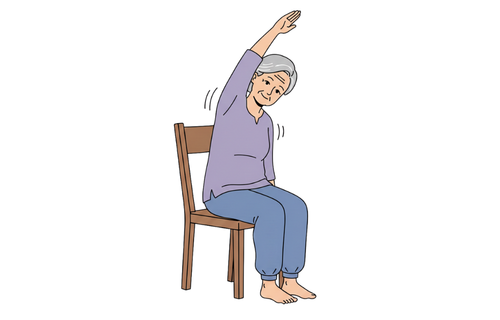
Sometimes, tight muscles along your sides can cause lower back pain.
- Step 1: Sit tall and keep both “sit bones” firmly pressed into the chair.
- Step 2: Reach your right arm up toward the ceiling.
- Step 3: Lean gently to the left, reaching over your head. Keep your right hip anchored to keep from tipping over.
- Step 4: Feel the stretch all along your side. Hold for two breaths and switch sides.
5. Seated Pigeon Pose (The Fancy Leg Cross)
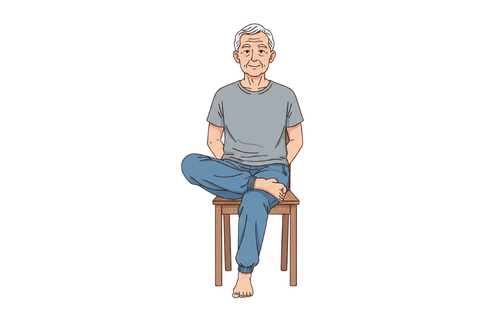
This exercise focuses on the hips. Tight hips are often a hidden cause of a stiff lower back.
- Step 1: Sit tall and cross your right ankle over your left knee. Your right knee will point out to the side.
- Step 2: If this is too much, just cross your right ankle over your left ankle instead.
- Step 3: Flex your right foot to protect your knee.
- Step 4: If you feel a stretch already, stay there. If you want more, gently lean your chest forward while keeping your back straight.
- Step 5: Hold for 30 seconds and then swap legs.
6. Knee-to-Chest Hug
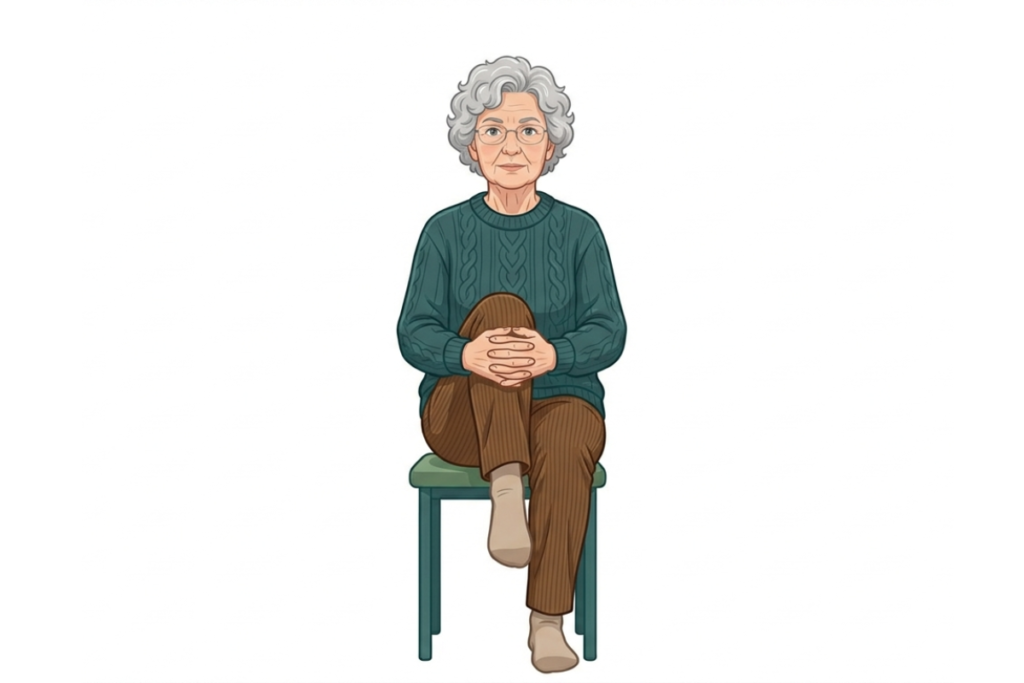
This move gently stretches your lower back.
- Step 1: Sit back a bit in your chair so you feel stable.
- Step 2: Lift your right knee and clasp your hands around your shin or behind your thigh.
- Step 3: Gently pull the knee toward your chest as much as your body allows.
- Step 4: Hold for five seconds, release it slowly, and repeat with the left leg. It is like giving yourself a little hug of appreciation.
7. Seated Pelvic Tilts
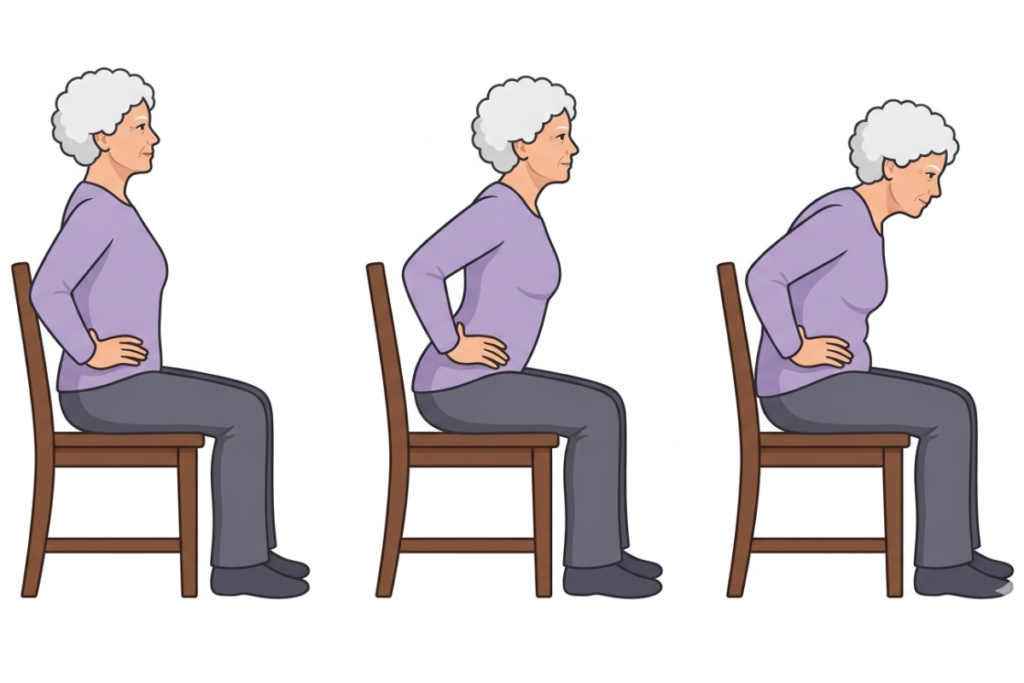
These movements are small but very effective. If you were standing, they would look like a slow, tiny dance move.
- Step 1: Sit tall with your hands on your hips.
- Step 2: Imagine your pelvis is a bowl of water.
- Step 3: Gently tip the “bowl” forward by arching your lower back slightly.
- Step 4: Then, tip the “bowl” backward by tucking your tailbone under and flattening your back against the chair.
- Repeat: Do this 10 times. It helps lubricate the base of the spine.
8. The Cactus Arm Reach
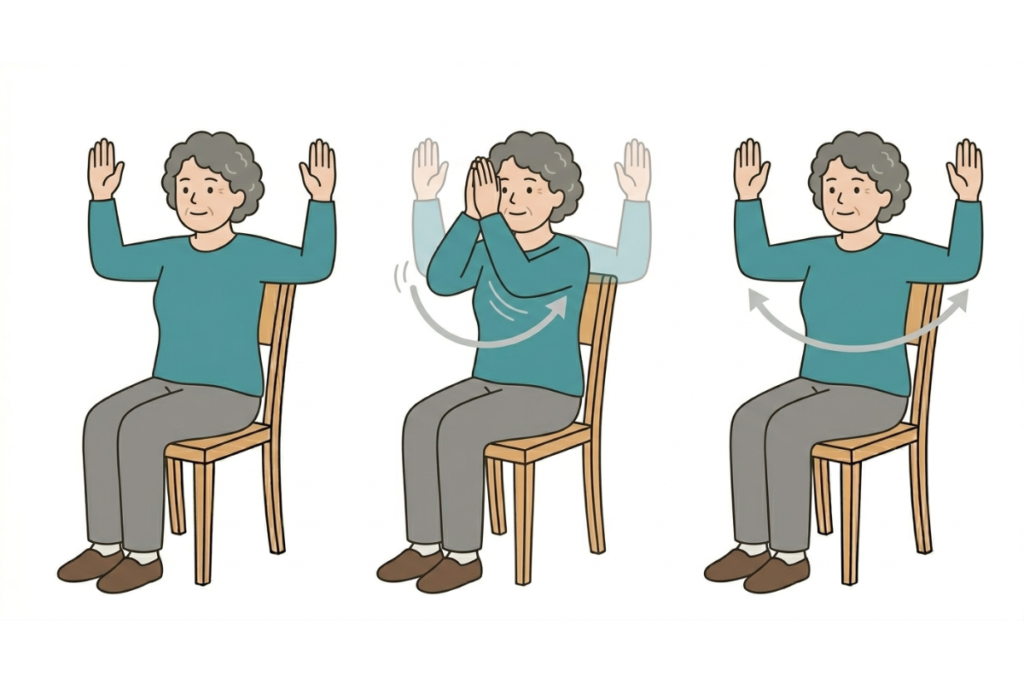
Poor upper back posture can lead to lower back pain. This exercise helps open up your posture.
- Step 1: Sit tall and bring your arms up to shoulder height, elbows bent at 90 degrees (like a cactus or a football goalpost).
- Step 2: Inhale and pull your elbows back slightly, squeezing your shoulder blades together.
- Step 3: Exhale and bring your forearms together in front of your face.
- Repeat: This helps keep you from “slumping,” which is the lower back’s biggest enemy.
9. Gentle Hip Circles
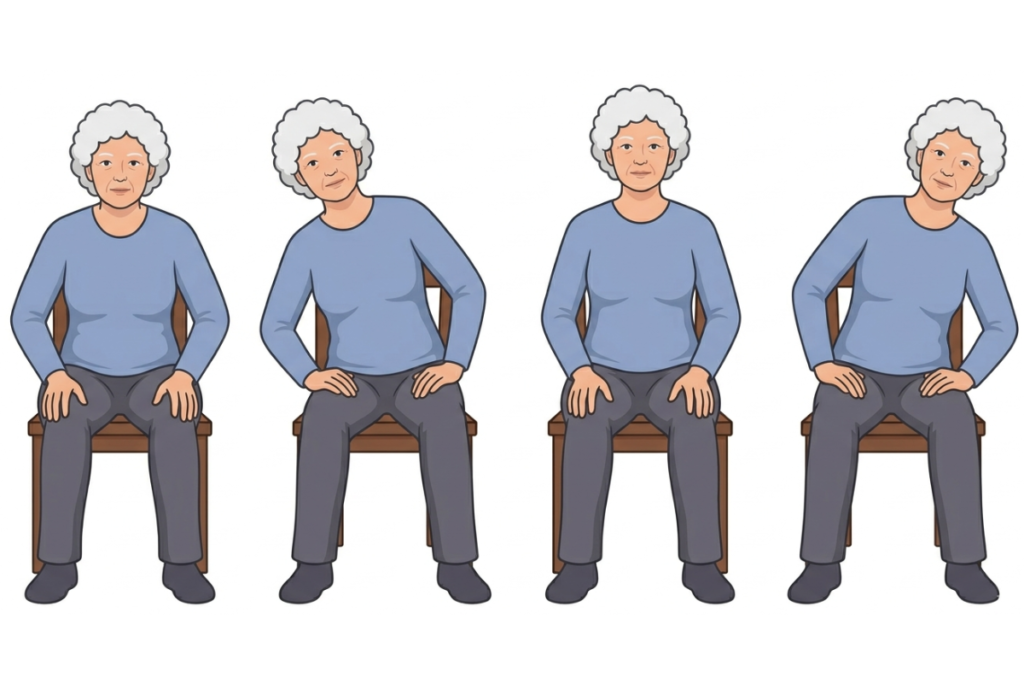
This exercise is also good for loosening the joint where your spine meets your hips.
- Step 1: Sit on the edge of the chair with your feet wide.
- Step 2: Hands on your knees.
- Step 3: Start making circles with your torso. Lean forward, to the side, back, and to the other side.
- Step 4: Keep the circles small at first, then make them bigger if it feels good. Do five circles one way and five the other.
10. The Shoulder Shrug and Release
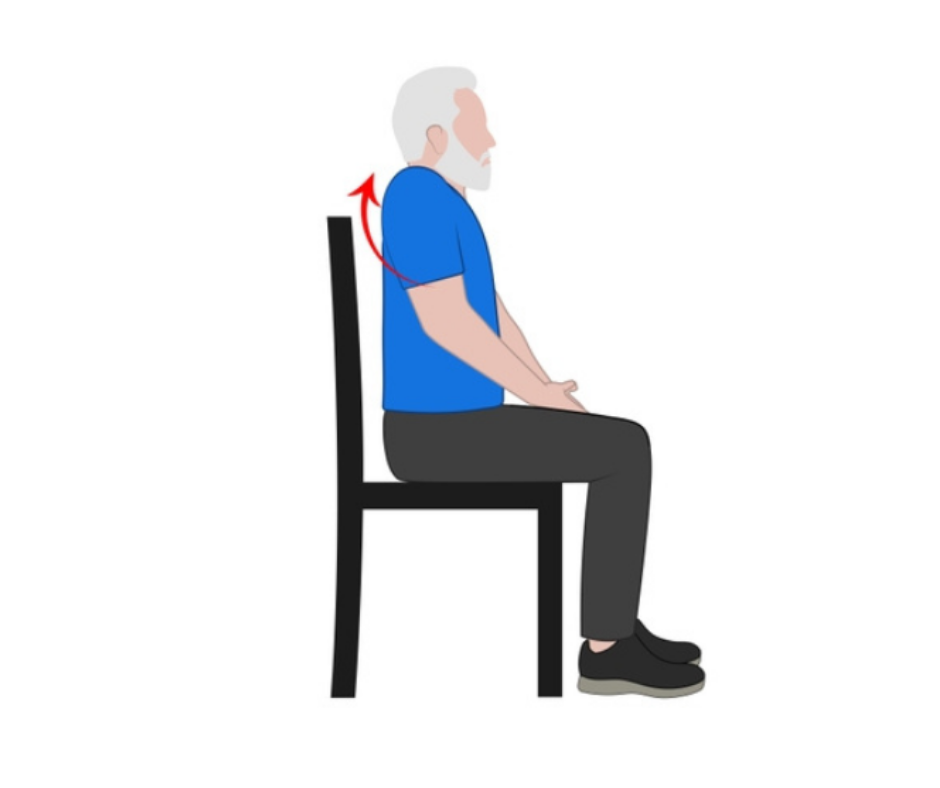
Stress often builds up in our shoulders and can affect the back. Let’s release that tension.
- Step 1: Take a deep breath and scrunch your shoulders all the way up to your ears.
- Step 2: Hold it for a second and imagine all your tension is gathered right there.
- Step 3: Exhale forcefully and let your shoulders drop down heavily.
- Step 4: Repeat this three times. You might even want to let out a little “whoosh” sound. It can feel very relaxing.
Staying Consistent is Crucial
The most important thing to remember is that you do not need to do these exercises for an hour each day. Five or ten minutes is enough. The goal is not to master yoga, but to feel good enough to pick up your grandkids or go for a walk without back pain.
If you forget to do these exercises, try adding them to your daily routine. For example, do a few Cat-Cows while your coffee brews, or try the Seated Twist during TV commercials. Small, regular movements help more than doing a lot all at once.
Listening to Your Body
You may have heard the phrase “no pain, no gain,” but that is not good advice for your back. We want “no pain, lots of gain.” If a move feels sharp or pinchy, stop. It is normal for one side to be tighter than the other. Our bodies are not perfectly even, and that is fine. Be patient with your back, move slowly, and treat it with care.
Final Thoughts
You do not have to do all ten moves at once. Try starting with the Seated Cat-Cow. It only takes about thirty seconds, and your spine will probably thank you right away.
Easing stiffness is about taking small steps for yourself. By adding these seated routines to strengthen the lower back to your daily routine, you are moving toward better mobility and less “snap, crackle, and pop.” You have spent years caring for others; now it is time to care for your back. You can do this!
